October 24, 2014

Track nearby aeroplane activity with Raspberry Pi and SDR

With an inexpensive software-defined radio (SDR) and a Raspberry Pi you can receive and decode signals sent from most planes that have a flight path close by to you. This is possible as the ADS-B (automatic dependent surveillance-broadcast) signal from the plane contains its' GPS coordinates - and this is the signal that the SDR-Pi combination and receive and decode.

From that point you can use instructions provided by the WhiskeyTangoHotel website you can easily install the software to make this possible. An interesting and inexpensive solution for budding avgeeks or those curious about using SDR receivers and their Raspberry Pi.

You can learn how from the WTH website. And for more, we're on facebooktwitter and Google+, so follow us for news and product updates as well.

Looking for a small yet useful OLED display for your Arduino (or Raspberry Pi)? Then check out our 128x128 pixel OLED Module. With a diagonal size of 1.5" and 16,384 colours to select from, so almost anything is possible. Furthermore there's a microSD card socket, and removable tabs on each side which can hold LEDs and buttons:

And using the module is made simple - we have tutorials and drivers for both the Arduino and Raspberry Pi platforms - great for experimenters or those who use both systems. Furthermore, check out the forum where members are already creating modified drivers to rapidly increase the display speed. For more information including our Quickstart guides - and of course to order - visit the OLED Module product page

October 24, 2014

Build your own laser-cut hexapod with Arduino

You can really do a lot with an Arduino and some inexpensive hobby servos. One example of this is the hexapod robot project described by Nick - better known as Mr Hobbyelectronics. He shows us how to control a bunch of servos fitted to a laser-cut frame which results with a neat walking hexapod. Check our the following video to see how it all comes together:

If you don't have access to a laser cutter, the hexapod could be reproduced with some carefully-cut balsa wood or corflute. Either way, check out Nick's great website for this and other interesting projects. And for more, we're on facebookGoogle+, and twitter - so follow us for news and product updates as well. 

Have you been reading about Arduino and would like to understand more so you can work with projects like the example above, but not sure where to start? Then order one of our Experimenter's Kit for Arduino - as used in many classroom and learning environments:

The package includes a wide variety of parts, sensors and modules including: a servo motor, lights, buttons, switches, sound, sensors, breadboard, wires and more. Furthermore a Freetronics Eleven Arduino-compatible board is included to make this an extensive hobby experimenter, inventor and starter kit. 

However we don't leave you alone to figure it all out, included is a great project and instruction booklet, plus access to a supporting web page and software examples. In other words - this is everything you need to get started for a fun range of electronics and Arduino related projects! So to get started or for more information and to order, check out the product page.

October 23, 2014

Automating curtains with an Arduino

Thanks to the simplicity of controlling external devices, the Arduino platform lends itself very well to the task of home automation (for example the Superhouse). One easy example of this has been documented by Elijah Carbonaro who uses an Arduino to control a curtain, making it easy to open or close at the press of a button.

In his example Elijah uses a continuous-rotation servo which can act as a normal motor, and with a pulley fitted can draw the curtain rope in either direction. This could also be done with a stepper motor - and most likely a better solution as some curtains require some effort to move. Either way, a quick demonstration is shown in the following video:

You could also use a real-time clock or a sensor to trigger the opening or closing of the curtains depending on the prevalent conditions. The details of this project can be found on the Instructables website. And for more, we're on facebook, twitter and Google+, so follow us for news and product updates as well.

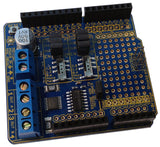
 There's so much you can do with an Arduino and motors - and the base of any project is a solid motor shield - such as our HBRIDGE: DC/stepper motor shield. Based around the powerful Allegro A4954 H-bridge driver IC you can control two DC motors with complete ease, or one bipolar stepper motor. With connections for external power management, a complete beginners' guide and documentation - motor control couldn't be any easier. For more information and to order, visit the HBRIDGE: page.

October 23, 2014

Controlling AC relays via USB using the LeoStick

Controlling AC power with a computer can initially seem to be a complex task, however with some thought and a few hours it's possible to control one or more relays with an Arduino-compatible board via almost any device with a USB output that can send serial text.

This has been demonstratred by Maurice Castro, who has connected two AC relay modules to his Freetronics LeoStick - which in turn is connected to a PC for power and control. The sketch (code) loaded into the LeoStick receives simple commands via USB and acts upon them to control the relays, all of which are sealed in a container out of harms way. Any programmer can then have their software send serial text out via USB and control the relays without too much effort at all.

To learn more, visit Maurice's interesting website. And for more, we're on facebookGoogle+, and twitter - so follow us for news and product updates as well.

Need a small Arduino-compatible for use with your own control projects? Then check out out our LeoStick. It's the Arduino Leonardo-compatible board that's cheaper and smaller than the original:

 Apart from being one of the smallest Arduino-compatibles on the market with USB, it also has an onboard RGB LED and piezo which can be used a knock sensor and various tune and sound effects. Plus you can add extra circuitry with the matching protostick! For more information and to order, click here.

October 22, 2014

Add an RS232 interface to your Raspberry Pi

Although there are many options for IO and data communication with a Raspberry Pi, one older form that is lacking by default is an RS232 interface. This would be useful for communicating with older technology such as POTS modems, serial printers or even old video terminals.

However if this takes your an interest a tutorial published by Joonas Pihlajamaa describes a neat circuit based around the Maxim MAX3232 interface IC, with which some small external circuitry you can add the RS232 interface to your Pi. 


So if you've seen an old VDU terminal or printer, perhaps have some fun and connect it to your Pi. To get started, visit Joonas' website. And for more, we're on facebookGoogle+, and twitter - so follow us for news and product updates as well.

If you need to create your own RS232 interface, the external circuitry would fit nicely on our PiBreak board. It provides labelled breakout pins for all GPIOs, a large prototyping area with solder pads, and power rails for easy power connection:

Furthermore the PiBreak also includes mounting hardware to firmly attach it to your Raspberry Pi using a nut, bolt, and spacer - and is compatible with all revisions of both model A and B Raspberry Pi computers. For more information about our PiBreak board, our Getting Started guide, and to order - visit the product page.

October 22, 2014

Experimenting with LEGO trains and automated level crossings with Arduino

Once again YouTube member Almightyarjen has demonstrated some fascinating LEGO train automation, this time with controlling the "classic" LEGO 7866 level crossing kit. Doing so isn't that difficult, by placing a light or other sensor at a point in the track preceding the crossing an Arduino can detect the oncoming train.

With a simple L293D-based motor control circuit it's easy to control the boom gates, and of course control the flashing lights is even easier. The results are shown in the following video:

For many more interesting videos that take advantage of Arduino and LEGO - check out the YouTube channel. And for more, we're on facebookGoogle+, and twitter - so follow us for news and product updates as well. 

Have you been reading about Arduino and would like to understand more so you can work with projects like the example above, but not sure where to start? Then order one of our Experimenter's Kit for Arduino - as used in many classroom and learning environments:

The package includes a wide variety of parts, sensors and modules including: a servo motor, lights, buttons, switches, sound, sensors, breadboard, wires and more. Furthermore a Freetronics Eleven Arduino-compatible board is included to make this an extensive hobby experimenter, inventor and starter kit. 

However we don't leave you alone to figure it all out, included is a great project and instruction booklet, plus access to a supporting web page and software examples. In other words - this is everything you need to get started for a fun range of electronics and Arduino related projects! So to get started or for more information and to order, check out the product page.

October 21, 2014

Experimenting with Raspberry Pi and Push Notifications

Now that many of us are using Anrdroid or iOS-based mobile devices, the ability to receive push notifications from our own projects is certainly something of interest, however doing so may have seemed quite difficult. However nothing could be further from the truth, and the process has been demonstrated by Mike Haldas.

Doing so requires using a service from the site instapush.im, which offers the required connectivity between your Raspberry Pi and mobile device. Then it's a simple matter of some python code to monitor GPIO, or take action based on your own parameters which can then trigger the instapush service and thus receive the push message on your device.

To learn how to do this yourself, check out Mike's excellent tutorial. And for more, we're on facebookGoogle+, and twitter - so follow us for news and product updates as well.

If you need to connect external circuitry to your Raspberry Pi, consider our PiBreak board. It provides labelled breakout pins for all GPIOs, a large prototyping area with solder pads, and power rails for easy power connection:

Furthermore the PiBreak also includes mounting hardware to firmly attach it to your Raspberry Pi using a nut, bolt, and spacer - and is compatible with all revisions of both model A and B Raspberry Pi computers. For more information about our PiBreak board, our Getting Started guide, and to order - visit the product page.

October 21, 2014

Using mbed and the Freetronics LCD Keypad Shield

The mbed development platform is an interesting online method of working with boards based around the ARM style of microcontrollers, and several of these boards have I/O pins laid out in the same way as the Arduino Uno and compatible boards, which opens them up to wide variety of hardware.

One example of this is out LCD Keypad shield, which is now very easy to use with ST Nucleo boards and mbed thanks to the work by Mihail Stoyanov and his mbed LCD library. With this integrated into your project it's possible to simply drop in our LCD and use it without any effort.

For more information about the mbed library and environment, start with the library page. And for more, we're on facebookGoogle+, and twitter - so follow us for news and product updates as well.

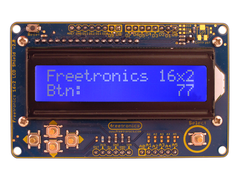
Looking for a rapid-use LCD for your Arduino or compatible projects such as the mbed above? Save time and move forward with the Freetronics LCD & Keypad shield which contains a bright 16x2 character LCD and five buttons that can be read from only one analog input pin:

October 20, 2014

Combine the power of Raspberry Pi and Arduino with our new PiLeven

The Raspberry Pi is much more powerful than an Arduino, but it has a few limitations of its own. Its I/O is much more limited, it can't use common Arduino shields, and it needs a regulated 5V power supply such as a USB connection. All those problems are solved with the PiLeven: The PiLeven is an Arduino-compatible board based on the Arduino Uno, but with a few changes. Obviously it's a bit of a strange shape! The PiLeven fits right on top of a Raspberry Pi (either model B or B+) using the Raspberry Pi expansion headers.

The PiLeven also has a high-current switchmode power supply, so you can plug in anything from 7V to 18Vdc using the standard 2.1mm jack. The PiLeven can power the Raspberry Pi, so you don't need a regulated 5V USB connection anymore.

Serial communications on the PiLeven is linked through to the Raspberry Pi, so your Pi can upload new sketches straight to the PiLeven or send/receive data and commands. We've included level shifters so the 3.3V Pi can talk safely to the 5V PiLeven. And you can plug standard Arduino shields right into the PiLeven, giving your Raspberry Pi access to the huge range of shields already available.

For more information about the PiLeven, including our tutorials - and to order yours today, visit the PiLeven webpage. And for more news and product announcements, follow us on facebookGoogle+, and twitter.

October 20, 2014

A remote-controlled doorbell with Raspberry Pi and node.js

Thanks to the ease of adding Internet-based connectivity to a Raspberry Pi, it lends itself to all sorts of remote-control and data gathering applications. One example of this is by Arvind Ravulavaru who has documented controlling a Raspberry Pi not only as a local doorbell, but one that can be controlled over the net via node.js and python.

The resulting project simply controls a GPIO pin from a remote, web-enabled device - however thanks to the clarity of Arvind's work you can use this as a framework for all sorts of applications. A quick demonstration of the remote doorbell is shown in the following video:

For all the code and an interesting tutorial, visit Arvind's website. And for more, we're on facebookGoogle+, and twitter - so follow us for news and product updates as well.

If you need to connect external circuitry to your Raspberry Pi such as the project above, consider our PiBreak board. It provides labelled breakout pins for all GPIOs, a large prototyping area with solder pads, and power rails for easy power connection:

Furthermore the PiBreak also includes mounting hardware to firmly attach it to your Raspberry Pi using a nut, bolt, and spacer - and is compatible with all revisions of both model A and B Raspberry Pi computers. For more information about our PiBreak board, our Getting Started guide, and to order - visit the product page.