November 07, 2014

Build a simple BASIC-programmable computer with Arduino

Those of us at a certain age will have memories of programming 8-bit computers in BASIC, and being very impressed with what was possible. If you'd like to relive this or demonstrate "how it used to be" to some youngsters then this project by Robin Edwards will fit the bill.

Their system uses an Arduino Uno or compatible board, an SPI-based display and a PS/2 keyboard hacked into the Arduino to emulate a typical 8-bit computer. 1k of RAM is available for programs, and they can be saved or loaded from the onboard EEPROM. Furthermore you can read and write to the analogue outputs, and almost every BASIC function is included. Programs can also start at power-up or reset, making simple automation possible. Watch the following video for a demonstration:

This is a great project, and could also be used for more serious purposes. For complete details, check out Robin's github page. And for more, we're on facebook, twitter and Google+, so follow us for news and product updates as well.

Looking for a small yet useful OLED display for your Arduino (or Raspberry Pi)? Then check out our 128x128 pixel OLED Module. With a diagonal size of 1.5" and 16,384 colours to select from, so almost anything is possible. Furthermore there's a microSD card socket, and removable tabs on each side which can hold LEDs and buttons:

And using the module is made simple - we have tutorials and drivers for both the Arduino and Raspberry Pi platforms - great for experimenters or those who use both systems.

Furthermore, check out the forum where members are already creating modified drivers to rapidly increase the display speed. For more information including our Quickstart guides - and of course to order - visit the OLED Module product page.

November 07, 2014

Control household devices with the TV remote control

Arduino is a perfect match for the world of home automation (for example superhouse.tv), however for some situations the need for simplicity overrules all other paramters. And there's nothing wrong with this - sometimes you simply want to turn the lights or fan on and off. This was the problem faced by Jonathan Knieper who solved it nearly with Arduino.

Jonathan uses an Arduino connected to a pair of mains-rated relays, each of which controls the power to a room light and fan control. And by adding an infra-red receiver to the Arduino and some quick code, the fan and light can be controlled with the TV remote control. This is demonstrated in the following video:

That's a great solution, however take care when working with mains-rated current. In some areas this work needs to be done by a licensed contractor. Nevertheless, for complete details check out the project page. And for more, we're on facebooktwitter and Google+, so follow us for news and product updates as well.

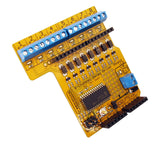
If you're looking for a simple way to control many relays from your Arduino, without using up all your digital I/O pins - check out our Relay8:  driver shield:

So what is the RELAY8:? It's a great Arduino shield that allows you to drive up to 8 relays from your Arduino using just 2 I/O pins with this shield. It communicates with your board using I2C, so you can even stack several shields together to drive 16, 24, or more outputs! Includes back-EMF protection and works with a wide range of relays. Perfect for home automation projects! For more information and to order, click here.

November 06, 2014

Build an Arduino-based Solar Charge Controller

Thanks to the popularity of his first project, Debasishi Dutta has followed up with version two of his solar charge controller - which this time is designed for 12V solar and battery systems. This new revisiion has  short circuit, overload and lightning protection - along with a near 20 x 4 LCD display to show system status.

It's great to see these kind of projects, Debasishi has used it to control the power system in his home, and it can be easily used for sheds, remote structures or by people who just want to rely less on the power grid. Finally, he takes us through the system in the following video:

For complete details, check out the charger's Instructable page. And for more, we're on facebookGoogle+, and twitter - so follow us for news and product updates as well.

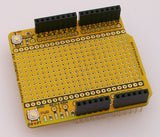
If you need to add external hardware or devices to your next Arduino project, you'll need a protoshield to mount the external circuitry. In doing so, consider our range of ProtoShields. From the tiny LeoStick to the Mega we have a wide range to suit your application.

November 06, 2014

The smart Arduino-controlled solar panel

Solar panels are generally fixed in one position, determined by the greatest amount of posisble sunlight that can be received in a certain area. However as the Earth rotates around the sun, a lot of solar energy isn't harnessed to the fullest amount. This problem can be solved by creating a solar panel system that can track sunlight.

One miniature example of this has been demosntrated by Instructables member diegoch2001 who shows that the sun can be tracked by using five light sensors, and an Arduino to measure the ambient light level from each sensor and determine the strongest area for sunlight. With this information the solar panel can then be rotated for maximum effectiveness.

Apart from experimenting wtih solar power, this would be a neat school project or prototype for other directional light-sensing devices. To learn how, visit the project page. And for more, we're on facebookGoogle+, and twitter - so follow us for news and product updates as well. 

Have you been reading about Arduino and would like to understand more so you can work with projects like the example above, but not sure where to start? Then order one of our Experimenter's Kit for Arduino - as used in many classroom and learning environments:

The package includes a wide variety of parts, sensors and modules including: a servo motor, lights, buttons, switches, sound, sensors, breadboard, wires and more. Furthermore a Freetronics Eleven Arduino-compatible board is included to make this an extensive hobby experimenter, inventor and starter kit. 

However we don't leave you alone to figure it all out, included is a great project and instruction booklet, plus access to a supporting web page and software examples. In other words - this is everything you need to get started for a fun range of electronics and Arduino related projects! So to get started or for more information and to order, check out the product page.

November 05, 2014

A DIY rechargeable mosquito repeller

There is some theory that claims you can repel mosquitos and other insects with ultrasonic sound waves, and has been quite a contentious issue for many years - dating back to the original kit from Dick Smith Electronics years ago. However it's always interesting to see new attempts, and one of these has been demonstrated by Instructables member "DangerousTim".

His device is based around a minimal Arduino-compatible circuit which has a simple transistor amplifier that drives the round piezo elements you can see in the image below. These can act as speakers and thus generate the ultrasonic sound waves. 

If you have an insect problem, this may be the solution - so for more information, visit the repeller's Instructable page. And for more, we're on facebook, twitter and Google+, so follow us for news and product updates as well. 

If you're wanting to make your own Arduino-compatible project such as the repeller above, you'll need an ATmega328P MCU with Arduino Uno bootloader:

This is the same Atmel AVR ATmega328P microcontroller used in the official Arduino Uno, as well as our ElevenEtherTenUSBDroid, and other boards. Perfect for building your own Arduino-compatible project directly on a breadboard or on a custom PCB, or for replacing the MCU in an existing board. Comes with the Arduino Uno bootloader pre-installed. Better still, it even has a special label stuck on top with details of the pinout, so you don't even need to look up the datasheet when connecting it up in your project! For more information and to order, click here!

November 05, 2014

Build a colour-activated Lock Box

And now for something different comes this colour-activated electronic lock box from the people at Make: magazine. This is one of the most imaginative things we've seen for a while, and is so blindingly simple I'm surprised nobody has done it before (sorry if you have!).

They have used an RGB LED to reflect light off a surface, and measure the reflected amount which will vary depending on the colour of the object being used. This can then be set as the "key" for the lock, which will need to be placed in the sensor apparatus to unlock the device. A quick explanation is given in the following video:

An interesting sample of "keys" could be gathered from those paint sample cards found in hardware stores. A lot of fun and this can be made without too much effort at all, so for compelte details check out the project Instructable page. And for more, we're on facebook, twitter and Google+, so follow us for news and product updates as well.


Looking for a light sensor? Although it can be tempting to use a light-dependent resistor, they're fragile and can give varying results. Instead - consider our LIGHT: light sensor module based around the digital TEMT6000 sensor. It gives consistent and reliable readings, and is incredibly easy to use with our Getting Started guide. For more information and to order, click here!

November 03, 2014

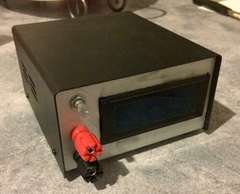
Build an Arduino-controlled constant-current dummy load

When testing power supplies or other circuits that deal with higher current loads, it can be convenient to have a dummy load - a device that can sink a pre-set amount of current. This can then simulate using the device under test in the real world - however commercial units can be expensive.

However thanks to Instructables member wigman27 you can not only build your own load but also delve into some interesting and very well explained theory behind the electronics, design principles and more about the project.

It's certainly a neat project, and somthing for the more advanced hobbyist to consider, so visit the project page to get started. And for more, we're on facebookGoogle+, and twitter - so follow us for news and product updates as well.

If you're looking for an Arduino Uno-compatible board to embed into various projects, choose what tens of thousands of others have done and use our Freetronics Eleven - the Arduino-Uno compatible with low-profile USB socket, onboard prototyping space and easy to view LEDs: 


November 03, 2014

Tracking sleep behaviour with the help of Arduino

Sleep Apnea is a problem for many people. and the ability to track one's movements while sleeping can provide data which is an interesting window in to the larger problem. Although it won't detect actual apnea events, the following project by backyard inventor Eddy provides a neat method of tracking movements.

Based around an accelerometer module, the device can take movement data when detected and store it in the Arduino's internal EEPROM. This can later be interrogated and analysed. It provides the framework for a more complex monitoring device, for example you could add a real-time clock IC and an SD card to make data retrieval simpler.

For more information, example code and progress reports check out Eddy's interesting website. And for more, we're on facebook, twitter and Google+, so follow us for news and product updates as well. If you're looking for an easy to use acceleromter, check out our AM3X accelerometer module:

This tiny 3-axis accelerometer module can operate in either +/-1.5 g or +/-6 g ranges, giving your project the ability to tell which way is up. Ideal for robotics projects, tilt sensors, vehicle data loggers, and whatever else you can dream up. Plus it's compatible with 3.3V and 5V boards. For more information and to order, click here.

October 31, 2014

Make your own Arduino-powered Laser Tag game

If you're looking for a cheap way to enjoy electronics, have fun and perhaps get some exercise then making your own laser tag game can fit the bill. The folks at Instructables have created a very easy to replicate version that uses universal remote controls instead of "laser guns", and built Arduino-powered receivers that can detect any IR signal from the remotes and register a hit.

Each player's vest is fitted with three IR receiver sensors, a piezo buzzer for sound effects and the Arduino sketch can learn the signal from the remotes to make rounding up enough controllers a simple task. And the final results looks like fun, as shown in the following video:

All the details can be found on the project page. And for more, we're on facebookGoogle+, and twitter - so follow us for news and product updates as well.

Need a small Arduino-compatible for use with your own portable projects? Then check out out our LeoStick. It's the Arduino Leonardo-compatible board that's cheaper and smaller than the original:

 Apart from being one of the smallest Arduino-compatibles on the market with USB, it also has an onboard RGB LED and piezo which can be used a knock sensor and various tune and sound effects. Plus you can add extra circuitry with the matching protostick! For more information and to order, click here.

October 31, 2014

Controlling Arduino from Visual Basic

For those of you who program in the world of Visual Basic, it is still easy to control an Arduino or compatible board that's connected via USB for interactive hardware projects and more. This has been demonstrated by Instructables member 100FUBU100 who has published some simple VB code that does just that.

Their example involves controlling RGB LEDs - the app allows the user to pick 8-bit RGB colour values which are then sent to the Arduino which in turn controls the LEDs. The data is sent as text from the PC to the Arduino and confirms how easy this is.

You can download both the Arduino and Visual Basic code from the project Instructable page. And for more, we're on facebookGoogle+, and twitter - so follow us for news and product updates as well.

If you're interested in experimenting with RGB LEDs as demonstrated above, we're offering large and bright 8mm diameter RGB LEDs:

They're in the common-anode format and look great when lit up. Ideal for colour-mixing and creating displays of all sorts. For more information and to order, visit the product page