October 03, 2014

Making your own customised Arduino Mega shield

Making your own PCBs is an interesting and popular rite of passage for many Arduino and electronics enthusiasts, and also a great way of compressing larger circuits you may have on a solderless breadboard back to a more compact and reliable format. However doing so can present a challenge, until now.

Instructables member DavidW10 has provided the foundation of a Mega shield by publishing his design file that can be used with Diptrace PCB software to add your own circuitry to the design. He runs through with a quick explanation of adding components, connecting them on the PCB and using the auto-router. You can use the free version of Diptrace with this project, which in itself is an interesting alternative to other PCB software.

To get started visit the Mega shield Instructable. And for more, we're on facebook, twitter and Google+ - so follow us for news and product updates as well.

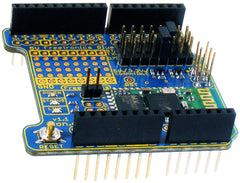
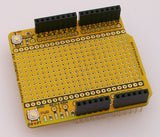
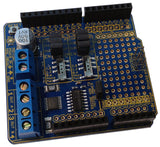
When working on your own projects based on an Arduino Mega or EtherMega that require external circuitry or wiring - and you're not up for making a PCB - consider using a Freetronics Protoshield Mega. It includes the male header pins and a reset button to fit, and is also a little shorter to allow space for the RJ45 socket on an EtherMega. For more information and to order, visit the product page

October 02, 2014

Hacking a classic Sinclair portable TV with Raspberry Pi

After seeing a tear-down of the classic Sinclair portable television, enthusiast Nathan Chantrell was motivated to locate his own unit and bring it in to the 21st century with the help of a Raspberry Pi. By removing the original and unique picture tube, there's just enough room for a Raspberry Pi board, circuitry for a small amplifier and speakers and even an infra-red remote control .

All that in combination allows for a neat RPi-based display solution in a contrasting enclosure that's sure to be a conversation piece. Nathan demonstrates the result in the following video where the Sinclair TV displays the original news article announcing the Sinclair TV:

Fantastic work, and a great use of an outdated product which you can learn more about from Nathan's website. And for more, we're on facebooktwitter and Google+, so follow us for news and product updates as well.

Looking for a small yet useful OLED display for your Raspberry Pi (or Arduino)? Then check out our 128x128 pixel OLED Module. With a diagonal size of 1.5" and 16,384 colours to select from, so almost anything is possible. Furthermore there's a microSD card socket, and removable tabs on each side which can hold LEDs and buttons:

And using the module is made simple - we have tutorials and drivers for both the Arduino and Raspberry Pi platforms - great for experimenters or those who use both systems. Furthermore, check out the forum where members are already creating modified drivers to rapidly increase the display speed. For more information including our Quickstart guides - and of course to order - visit the OLED Module product page

October 02, 2014

Add voice-control to your Arduino with an Android device

Adding voice-control to an Arduino-based project isn't that new, and can be done with some expensive shields that utilise external voice processors. However many of us may have access to an older Android device that is unused - which can now have a second life thanks to a new app called "Blue Act".

Blue Act is a voice-interpreter app that can convert your voice commands to text which is then sent via Bluetooth or directly through USB via an OTG cable between the Android device and the Arduino. Then it's a simple matter of having the Ardiuno sketch monitor for the required text commands incoming from serial and then taking action. The app runs on Android v3.1 or greater which makes the choice of device to use easy, and it does work - as shown in the following video:

At the time of writing the app is free, so without too much effort you can test it yourself. You can get started from the project demonstration page. And for more, we're on facebookGoogle+, and twitter - so follow us for news and product updates as well.

To reproduce the system above with a wireless Bluetooth link you can use our new Freetronics Bluetooth Shield:


We've made it simple to use - the Bluetooth Shield acts as a serial link between the other Bluetooth device. Furthermore there's a wide range of jumpers allowing you to select which digital pins to use for data transfer, increasing compatibility with other shields. And with our Quick Start guide it's easier than ever.

Our Bluetooth Shield for Arduino is now in stock and ready to ship, so for more information and to order - visit the shield's product page.

October 01, 2014

Make your own Arduino-powered Mothbot

Just as moths are attracted to lights, so is the following robot with the Mothbot name by Instructables member natantus. The Mothbot is a neat introductory robot project that is inexpensive to make and has lots of potential.

The original design uses two light sensors to determine the direction of a light source, then turns to meet and travel towards the source powered by two continuous-rotation servos and large wheels. 

We really like this project due to the level and clarity of instructions, which makes it easy for almost any beginner to make their own interactive robot. To get started, visit the robot's project page. And for more, we're on facebooktwitter and Google+, so follow us for news and product updates as well.

Looking to detect changes in light levels? Don't fool about with irregular light-dependent resistors. Instead use our LIGHT: light sensor module with the TEMT6000 light sensor which gives consistent and repeatable readings even between different units. Simple to use and versatile for many applications. For more information and to order, click here

October 01, 2014

Turn your Arduino into a Logic Analyser with node.js:

Making your own test equipment is an interesting learning experience, and a new example of this has been documented by Instructables member ptorelli and their logic analyser. This is an interesting twist on the usual analyser as it is a combination of Arduino-compatible hardware and a web browser, which uses HTML5, Node.js and Javascript.

The resulting device can sample four channels - or less with a greater memory depth. The software stack is an interesting combination however an explanation and required code is provided so you can recreate your own. Finally the browser interface resembles that of more expensive commercial solutions:

For the complete details to make your own version, visit the project's Instructable page. And for more, we're on facebookGoogle+, and twitter - so follow us for news and product updates as well.

If you need to add external hardware or devices to your next Arduino project, you'll need a protoshield to mount the external circuitry. In doing so, consider our range of ProtoShields. From the tiny LeoStick to the Mega we have a wide range to suit your application.

September 30, 2014

Build a "Topsy Turvy" clock

Time for another interesting clock project, and this week we have the latest effort by Andy Clark which is his "Topsy Turvy" clock. Imagine a normal analogue clock - but with the numbers around the dial not in the correct order. However the hands still point to the correct digits to match the real time  - and thus a different and amusing clock style.

Two stepper motors are used to drive the hands, and with some clever gears can turn the original hands of the older clock used in the project. The time is kept with a DS1307 real-time clock IC, and a simple user interfacer is available via a serial monitor or terminal to set the time. A run through of the clock is shown in the following video:

Kudos to Andy for such a different and amusing timepiece, of which you can learn about from his website. And for more, we're on facebook, twitter and Google+, so follow us for news and product updates as well.

 There's so much you can do with an Arduino and motors - and the base of any project is a solid motor shield - such as our HBRIDGE: DC/stepper motor shield. Based around the powerful Allegro A4954 H-bridge driver IC you can control two DC motors with complete ease, or one bipolar stepper motor. With connections for external power management, a complete beginners' guide and documentation - motor control couldn't be any easier. For more information and to order, visit the HBRIDGE: page.

September 30, 2014

Trampalino - the Arduino-powered liquid pouring system

The Arduino platform lends itself very well to many forms of automation, whether that be controlling relays or moving actuators and motors depending on a certain outcome. Another interesting example of this has been demsontrated by Savio Dimatteo who has created an automated liquid-pouring system.

Unlike other versins which use pumps and flow meters, Savio's version is clever in its' simplicity ... a straw is fitted to the bottom of the storage vessel, and attached to a servo. This servo can then bend the straw upon command and thus allow the liquid to flow (or not). This can then be controlled using a near user-interface with three buttons and an LCD. You can see it in action through the following video:

This could be fun for a school project, such as automated plant waterin or perhaps adjusted for other purposes. Either way, check out Savio's website to learn how. And for more, we're on facebooktwitter and Google+, so follow us for news and product updates as well.

If you're looking to learn how to use an Arduino with sensors, servos, LCDs and much more - you can't go past reading a copy of "Arduino Workshop -  A Hands-On Introduction with 65 Projects” by John Boxall.

Arduino Workshop takes the reader from having zero knowledge about the Arduino platform, electronics and programming and leaves them with the know-how and instructions on everything from blinking an LED, to robotics, wireless data, cellular communications, motor control, sensors, Internet connected systems and more. For more information including a sample chapter and table of contents, visit the book page.

September 29, 2014

Play "Snakes and Ladders" with Raspberry Pi

Using technology some interesting versions of classic games can be recreated, and one example of this is "Snakes and Ladders". A 21st-century version has been demosntrated by Les Pounder who named his version "Pythons and Resistors".

The game board has reed switches mounted under the heads of the pythons, and at the base of the resistor "ladders". These are connected to the Raspberry Pi's GPIO and activated when a player's piece is placed on top (as they each contain a magnet). With this the RPi can then detect if a player has landed on a point where they travel up or down the board and also play a matching sound effect. Finally the Pi also offers an electronic die through LEDs arranged in an appropriate pattern.

Furthemore Les has documented the project in a simple manner, making it suitable for all beginners, so visit his project page to get started. And for more, we're on facebookGoogle+, and twitter - so follow us for news and product updates as well.

If you need to connect external circuitry to your Raspberry Pi such as the game project above, consider our PiBreak board. It provides labelled breakout pins for all GPIOs, a large prototyping area with solder pads, and power rails for easy power connection:

Furthermore the PiBreak also includes mounting hardware to firmly attach it to your Raspberry Pi using a nut, bolt, and spacer - and is compatible with all revisions of both model A and B Raspberry Pi computers. For more information about our PiBreak board, our Getting Started guide, and to order - visit the product page.

September 29, 2014

Experimenting with analogue DC output from Arduino PWM

One thing lacking from the Arduino Uno and compatible boards is a true digital to analogue converter, that is an output to create a varying output signal. Although it's possible to create the illusion of a DAC using the PWM (Pulse-Width Modulation) pins, this is just a 5V square wave turned on and off at with a varying period. However with some inexpensive passive components it's possible to generate some analogue output.

This has been demosntrated by Instructables member DavidW10 who shows us how to use an RC circuit (resistor and capacitor) to convert a pulsed signal into a flatter signal. For example in the following image you can see the PWM signal before and after being passed throug the RC circuit:

Although this is not an accurate replacement for an external DAC IC, the methods demonstrated are very simple an inexpensive to implement - and can form the basis for some fun sound effects and more. So to learn how, visit the project Instructable page. And for more, we're on facebookGoogle+, and twitter - so follow us for news and product updates as well.

If you're looking for an Arduino Uno-compatible board to embed into various projects, choose what tens of thousands of others have done and use our Freetronics Eleven - the Arduino-Uno compatible with low-profile USB socket, onboard prototyping space and easy to view LEDs: 

September 26, 2014

Add RFID access to your computer with Arduino

As an Arduino Leonardo or compatible board such as our Freetronics LeoStick can emulate a USB keyboard or mouse, it gives you many new options for creating alternative input devices to be used with computers and so on. One interesting example of this is by YouTube user planetleak who created an RFID access logon system for their personal computer.

Doing so is easy, with using an inexpensive RFID reader connected to the Arduino. When an RFID card is presented to the reader, the card's number is compared with pre-stored values - and if a match is found the Arduino sends the required keystokes acting as a USB keyboard to log in to the computer. This is shown in the following video:

A neat way to give access to a computer withour sharing passwords. For links to the code and video, visit the project's YouTube page. And for more, we're on facebookGoogle+, and twitter - so follow us for news and product updates as well.

Need a small Arduino-compatible for use with your own USB HID emulation projects? Then check out out our LeoStick. It's the Arduino Leonardo-compatible board that's cheaper and smaller than the original:

 Apart from being one of the smallest Arduino-compatibles on the market with USB, it also has an onboard RGB LED and piezo which can be used a knock sensor and various tune and sound effects. Plus you can add extra circuitry with the matching protostick! For more information and to order, click here.