September 15, 2014

"StorageBot" - the voice-controlled parts organiser system

Like most of us you may accumulate hundreds of different types of parts, components and things "that may come in handy one day" which all end up in random or somewhat organised piles of drawers, to then be forgotten. Maker Dang Trinh had the same experience, but instead created an amazing solution to finding his parts - the StorageBot.

This is a huge shelf of component drawers, which has a vertical X-Y platform and device that can move to any drawer location and push it out a short distance. This is combined with a PC running a custom Visual Basic application along with the Microsoft Speech SDK which enables the software to accept voice commands. In turn, this controls the motors behind the shelves to create a voice-controlled parts drawer locator. You have to see it to believe it, so check out the following video:

Kudos to Danh for such an awesome project, whose details can be found on Instructables. And for more, we're on facebookGoogle+, and twitter - so follow us for news and product updates as well.

If you're looking for an Arduino Uno-compatible board to embed into various projects, choose what tens of thousands of others have done and use our Freetronics Eleven - the Arduino-Uno compatible with low-profile USB socket, onboard prototyping space and easy to view LEDs: 


September 15, 2014

Build you own Arduino-based model train controller

After long periods of hard use or storage, model train controllers can often become unreliable or simply no longer work at all. Although changing to digital control is becoming popular - this can become expensive very quickly and unnecessary for simple layouts. Enthusiast John Spencer was faced with the same dilemma when upgrading a family member's layout and thus turned to the world of Arduino to build a new controller.

With the use of our Eleven Arduino-compatible board and the HBRIDGE dual DC motor control shield, the foundation of a smooth DC train controller can be build. John went further and built the system into a great enclosure, added LED level meters for output level display and used an upgraded power supply to keep the trains running well - which you can watch in the following video:

Another great example of how the Arduino platform can be used in other hobbies. For more information, check out John's project page. And for more, we're on facebook, twitter and Google+, so follow us for news and product updates as well.

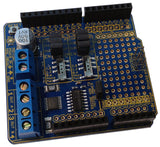
 If you're looking into starting with Arduino and motor control  - check out our new HBRIDGE: DC/stepper motor shield. Based around the powerful Allegro A4954 H-bridge driver IC you can control two DC motors with complete ease, or one bipolar stepper motor. With connections for external power management, a complete beginners' guide and documentation - motor control couldn't be any easier. For more information and to order, visit the HBRIDGE: page.

September 12, 2014

Build an Arduino-controlled Solar Battery Charger

There's an almost unlimited amount of energy from the sun, so there's good reason to harness it wherever possible - and one way of this is to make a solar-powered battery charger. However doing so isn't as simple as connecting the panel to a battery, a carefully-crafter charge and monitoring circuit is required to ensure safe charging for the battery and the end user.

Thus we're happy to see a neat charger circuit documented by Instructables member skygate who has developed an efficient lead-acid battery charger that's up to 90% efficient even up to higher temperatures, and utilises an MPPT control system to ensure the battery is charged at the correct rate. This is an excellent example thanks to the level of detail with regards to the theory behing the charging circuit and quite educational. 

So as summer is coming around soon this might be an ideal time to start researching solar charging via this Instructable. And for more, we're on facebookGoogle+, and twitter - so follow us for news and product updates as well.

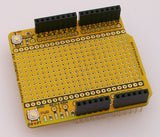
If you need to add external hardware or devices to your next Arduino project, you'll need a protoshield to mount the external circuitry. In doing so, consider our range of ProtoShields. From the tiny LeoStick to the Mega we have a wide range to suit your application.

September 12, 2014

An AVR-based Chronograph from concept to PCB

It's always interesting and useful to read about projects in great detail - from concept to finished product, and all the considerations that need to be made along the way. One example of this is a chronograph project by Instructables member mofoya, who takes us on a journey of building an AVR-based device to measure the time taken for an object to move between two points.

Originally designed to measure the speed of a model rocket, the chronograph can be used for all sorts of moving things - and can be set to display speed in various units through a series of DIP switches. Furthermore the processing of developing the code in C, designing the hardware and circuit through to PCB stage is documented in detail, making this project an interesting read at least.

So to get started, visit the project's Instructable page. And for more, we're on facebookGoogle+, and twitter - so follow us for news and product updates as well. 

If you find yourself working with AVR-based projects or uploading firmware to various projects - then you'll need our USBasp - the USB in-circuit programmer for Atmel AVR controllers. Based on the original design by Thomas Fischel, it's fully compatible with the Arduino IDE and all three major operating systems, using the USBasp is a cinch.

You can select 3.3V or 5V target voltages, supply power to your project via theUSBasp and even update the firmware on board yourself.  Furthermore we've included the ICSP cable and microUSB cable to it's ready to use out of the box. 

For more information including our Getting Started guide, design information and to order - please visit the USBasp product page. And to keep up with product announcements, we're on twitter and Google+ - so follow us for news and product updates as well. 

September 11, 2014

Make a motion-controlled lamp base with Arduino

With some simple sensors and imagination you can create all sorts of devices with an Arduino as the central controller. One example of this has been created by Instructables member gigafide and their motion-controlled desk lamp. 

By using three ultrasonic distance sensors and the data they generate when an object such as a hand passes by, the Arduino can determine the movement of the hand and then control servos inside a lamp arm. And thus the lamp's direction and rotation can be controlled by the wave of a hand. This is demonstrated in the following video:

That's a great project, and could become the framework for all sorts of hands-free control systems, so visit the Instructable page to get started. And for more, we're on facebookGoogle+, and twitter - so follow us for news and product updates as well. 

Have you been reading about Arduino and would like to understand more so you can work with projects like the example above, but not sure where to start? Then order one of our Experimenter's Kit for Arduino: 

The package includes a wide variety of parts, sensors and modules including: a servo motor, lights, buttons, switches, sound, sensors, breadboard, wires and more. Furthermore a Freetronics Eleven Arduino-compatible board is included to make this an extensive hobby experimenter, inventor and starter kit. 

However we don't leave you alone to figure it all out, included is a great project and instruction booklet, plus access to a supporting web page and software examples. In other words - this is everything you need to get started for a fun range of electronics and Arduino related projects! So to get started or for more information and to order, check out the product page.

September 11, 2014

Windows Phone 8 communicating with Arduino using Bluetooth

If you're using a Windows Phone 8 device the world of mobile to Arduino communication is still possible, and thanks to the tutorial by Marcos Pereira. He demonstrates how to build a serial data connection between an Arduino and a Windows Phone 8 device, and demonstrates some simple automation,

Those of you who are coding for WP8 won't have any problems at all, and Marcos has done a great job in explaining what's necessary. The example works well and is demonstrated in the following video:

For a complete explanation including code for both platforms, visit the Nokia developer website. And for more, we're on facebookGoogle+, and twitter - so follow us for news and product updates as well.

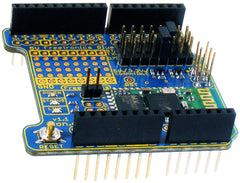
As part of the Arduino and Bluetooth experience you'll need a Bluetooth device for your Arduino projects, and to meet this need we've released our new Freetronics Bluetooth Shield:


We've made it simple to use - the Bluetooth Shield acts as a serial link between the other Bluetooth device. Furthermore there's a wide range of jumpers allowing you to select which digital pins to use for data transfer, increasing compatibility with other shields. And with our Quick Start guide it's easier than ever.

Our Bluetooth Shield for Arduino is now in stock and ready to ship, so for more information and to order - visit the shield's product page.

September 11, 2014

Check your mailbox from inside with Arduino

If you're always impatient for the mail to arrive, and need to know the moment it has been received then the following project by Instructables member 1Serg may solve your problem. His solution involves a small Arduino-compatible board inside the mailbox that detects if the mailbox door has been opened with a magnet and reed switch.

Once the door has been opened (and hopefully real mail inserted), this Arduino will send data to another which is inside the house via inexpensive RF data link modules. The receiver can then activate an LED or other device to get your attention. It's a neat solution to a common problem, and complete details to make your own can be found on the Instructable page. And for more, we're on facebookGoogle+, and twitter - so follow us for news and product updates as well.

Need a small Arduino-compatible for use with your own projects? Then check out out our LeoStick. It's the Arduino Leonardo-compatible board that's cheaper and smaller than the original:

 Apart from being one of the smallest Arduino-compatibles on the market with USB, it also has an onboard RGB LED and piezo which can be used a knock sensor and various tune and sound effects. Plus you can add extra circuitry with the matching protostick! For more information and to order, click here.

September 10, 2014

Make a desktop laser engraver from Arduino and old CD writers

With a little effort you can unlock a lot of value from computer parts that may have otherwise been thought of as out of date. One example of this is a CD or DVD writer drive, and Davide Gironi has shown how this can be the base for a desktop laser engraver. 

The platform for the engraver is moved using two motor assemblies from old CDROM drives, and the laser used for the engraving also comes from an old writer driver. They're controlled via an Arduino and external motor driver circuits - with the system being controlled using a PC and grbl open-source parsing software. And it works well, as shown in the following video:

 So next time you see some old optical drives and think they're useless - think again and consider what can be done with the parts, then check out Davide's project page. And for more, we're on facebook, twitter and Google+, so follow us for news and product updates as well.

 If you're looking into starting with Arduino and motor control  - check out our new HBRIDGE: DC/stepper motor shield. Based around the powerful Allegro A4954 H-bridge driver IC you can control two DC motors with complete ease, or one bipolar stepper motor. With connections for external power management, a complete beginners' guide and documentation - motor control couldn't be any easier. For more information and to order, visit the HBRIDGE: page.


September 10, 2014

Build a POV clock with Arduino and an old hard drive

It's great to see imagination at work, and with this project we're certainly surprised at what can be done with a disused hard disk drive. In this example the rotating platter has been re-purposed into the face of a clock which uses persistence-of-vision and RGB LEDs to display the time. 

A notch on the rotating platter is illuminated using the LEDs and using some clever code it is highlighed at the precise time in order to give the illusion of two "hands" of an analogue clock. Check out the following video to see what we mean:

Furthermore the clock can be altered via an infra-red remote control so mounting it on a wall and out of reach isn't a problem. For more details and design files to start your own, visit the project's Instructable pageAnd for more, we're on facebooktwitter and Google+, so follow us for news and product updates as well.

The most important part of any clock or timer-based project is the inclusion of an accurate real-time clock IC. Here at Freetronics we have the Maxim DS3232 real-time clock IC module:

Apart from keeping accurate time for years due to the temperature-controlled oscillator and having a tiny coin-cell for backup, it is very simple to connect to your Arduino project. A driver library allows your program to easily set or read the time and date. Perfect for clock projects, dataloggers or anything that needs to know the date and time. Furthermore it contains a digital thermometer and 236 bytes of non-volatile memory to store user settings and other data. For more information, check out the module page here.

September 09, 2014

Create an IR remote-controlled power outlet with Arduino

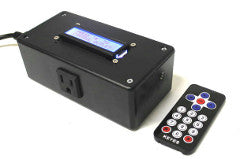
Experimenting with remote controls is funa and can lead to creating useful projects, and one of these is by Instructables member bergerab who demonstrates how to control an Arduino via infra-red remote control and thus a mains power outlet. Although they only work over a line-of-sight distance, IR remotes are very easy to use and can send many commands without much effort.

Thanks to Ken Shirriff's excellent Arduino library you can also work with these handy remotes, and even use the remote from your TV or other household appliance with your Arduino. The tutorial details how to control mains current via a relay, which we don't recommend you do unless you're a licensed electrician. However the theory is applicable to other projects and thus worth studying.

To learn more, check out the project's Instructable page. And for more, we're on facebookGoogle+, and twitter - so follow us for news and product updates as well.

If you need to add external hardware or devices to your next Arduino project, you'll need a protoshield to mount the external circuitry. In doing so, consider our range of ProtoShields. From the tiny LeoStick to the Mega we have a wide range to suit your application.