There's so much you can do with a Raspberry Pi - thanks to the ease of connecting external hardware to this small computer and the Internet-connectivity possibilities you can create all sorts of remote-controlled devices.
One example of this is by Derek Dickerson who explains to us how to create a remote-control pan/tilt security camera whose vision can be monitored from a remote website. The system uses the RPi-Cam-Web-Interface and some simple python code. Derek runs through the system in the following video:
If you're interested in making your own cameras, visit the comments section of Derek's YouTube video page. And for more, we're on facebook, Google+, and twitter - so follow us for news and product updates as well.
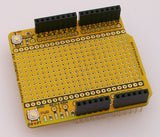
If you need to rig up some hardware interfacing to your Pi, one options is to use our PiBreak board. It provides labelled breakout pins for all GPIOs, a large prototyping area with solder pads, and power rails for easy power connection:

Furthermore the PiBreak also includes mounting hardware to firmly attach it to your Raspberry Pi using a nut, bolt, and spacer - and is compatible with all revisions of both model A and B Raspberry Pi computers. For more information about our PiBreak board, our Getting Started guide, and to order - visit the product page.