Arduino is a very popular and easy to use programmable board
for creating your own projects. Consisting of a simple hardware platform and a
free source code editor with an easy “one-click compile/upload” feature, it’s
designed to be really easy to use without being an expert programmer.
Arduino is also the most popular microcontroller board for
advanced users and all kinds of more ambitious projects. It’s been used to make
robots, home automation gadgets, automotive projects, for sensing and
controlling lights, motors, locks and servos, sound and video, interactive
objects like animated sculptures, toys and games, radio links and just about
anything else you can dream up. It can even be a web server and connect your
projects to the Internet. A huge number of example projects (including both hardware designs and
software source code) are available to help beginners get started.
Plug-in expansion boards called “shields” add
extra functionality, and we also stock a handy range of modules to make it easy
for you to incorporate sensors, actuators, sound input and output, and visual
feedback into your projects.
The current version of the Arduino hardware reference design is called the “Uno” (or “One” in Italian) and is published by the Arduino team. It provides four basic functional elements:
- An Atmel “ATmega328P” AVR microcontroller
- A simple 5V power supply
- A USB-to-serial converter for loading new programs onto the board
- I/O headers for connecting sensors, actuators, expansion boards, etc
The Freetronics “
Eleven” is based on the Uno reference design and is 100% compatible with it, but with a number of design updates and improvements:
- Prototyping area included so you can add your own parts
- Gold-plated PCB for maximum robustness
- Connection markings on both top and bottom
- D13 LED isolated using a FET to prevent input bias
- USB socket replaced with smaller mini-USB socket
- LEDs moved to edge of board for easier visibility when another board is stacked on top
The basic reference design is great for general-purpose projects, but it provides fairly minimal functionality. Its hardware functionality can be expanded in two main ways.
The first method is to use expansion boards called “shields” that can be plugged into the top of the expansion headers. Shields can be complete pre-built boards with all parts already installed for a specific purpose, such as the Freetronics
Ethernet Shield that provides LAN connectivity:
Alternatively, blank shields called “
Prototyping Shields” provide a matrix of free space for you to add your own parts and assemble your own projects to suit your own design:
For specific applications there are also special versions of Arduino-compatible boards that incorporate extra functionality right onto the microcontroller board itself without the need for a separate shield. For example, the Freetronics
EtherTen is a complete Arduino-compatible board with LAN connectivity and microSD card support incorporated directly into it:
Another example of a special-purpose board is the Freetronics USBDroid which is an Arduino-compatible board with USB host connectivity built-in, allowing it to connect to Android-powered devices such as tablets and phones as a peripheral to send/receive data via USB.
If you are just getting started with Arduino, your best option is to start with a general-purpose board such as the Freetronics Eleven plus some prototyping shields to experiment with. If you have special requirements for specific projects you can then expand the capability of the Eleven using shields, or use other specialist boards such as the EtherTen or USBDroid.
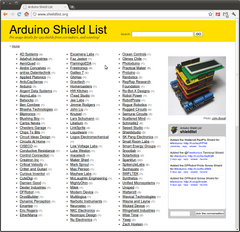
There are a huge range of shields available, with nearly 300 listed on the "
Arduino Shield List" site:
The simplest way to get starting writing programs for the Arduino is using the official Arduino IDE. It consists of a simple code editor with syntax highlighting and a number of convenience buttons for compiling and uploading "sketches" (the Arduino term for programs) to your board. You simply prepare the program in the IDE, plug in your Arduino board using a USB cable, click the "Upload" button and your program is compiled and sent across to the board where it is saved in non-volatile memory. Any time the board starts up or is reset it will immediately begin running the last program you uploaded:

Because the Arduino is really just a development board for the very popular Atmel AVR microcontroller, it's also possible to use more traditional software development tools to write programs for it. Many advanced developers use their favorite code editor such as Vim, Emacs, or Eclipse, and then use the avr-gcc compiler to prepare the software for upload to the board using a tool such as AVRDUDE. While the Arduino gives you a simple entry point to working with microcontrollers, it doesn't limit you from going way beyond the basics and developing very advanced projects using whatever tools you feel comfortable with.
The official Arduino website has more information for both beginner and advanced developers, including very active user forums.


